How To Download A Blogger Theme/Template And Install on my Blog Using A Mobile Phone (Step-By-Step Guide)
If you ever come across any desired blogger theme/template and you didn't know how to download using a mobile phone with the full installation process, I promise you that, if you dedicate your time reading this ultimate guide and following my step by step instructions until the end of the tutorial, you will easily download any desired Blogger theme and use it on your blog. After reading this article I hope you will buy me a cup of coffee 😜.
Step 1: Visit Your Best Theme Store
There are uncountable websites that offer as many blogger themes as they can flaunt. You can opt for colorlib which is my best bet.
Step 2: Download The Theme
Before making any download here, Know that your chosen niche will help you download the most outstanding theme. Remember to sort by categories which will ease your task and help you download the correct theme based on the topic of your blog(your niche).
Step 3: Download WPS App
We had earlier discussed essential mobile blogging apps which I had enlightened you on all necessary blogging apps including the role of WPS office. This is a handy app that serves as a blogger theme/template editor. Get it On Google Play.
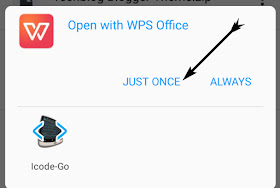
Step 4: Open With WPS Office
Go to your download folder in the phone storage section, select your theme then choose open with WPS office.
Step 5: Open The Template
Your template must appear as a file with a question mark icon enclosed in a small box on the left side of the template name. The template file size is always the largest and it appears the first at the top with the name of the theme
Step 6: Save The Theme
After opening the theme, don't edit anything for you are not familiar with stuffed codes used to come up the theme, click on edit tab, tap on Save, choose your favorite storage folder then click on save
Step 7: Rename The Theme
Since we don't want to copy the whole codes then paste directly on the theme configuration section, we first need to locate the file then edit by erasing the .docx and replace it with .xml extension. Example
Pixelbloggertheme.docx edit so as to let it appear as pixelbloggertheme.xml
Step 8: Sign In Your Blogger Account
Sign in your blogger account using a chrome browser or any search engine app of your choice.
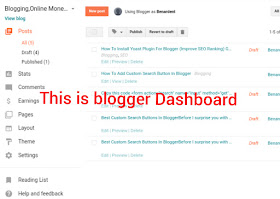
Step 9: Go To Dashboard
Blogger dashboard is the first page that loads after signing in.
Step 10: Go To Theme
The theme is where the appearance, layouts, styling, and so on are preserved so as to control all the assigned activities on a website.
Step 11: Go To Edit HTML
This feature is old fashioned, unlike the classic mode. You can shift to classic mode mounting classy and easy user customization.
Step 12: Tap On Backup Your Theme
We sometimes lost our data on our phones and computer which becomes unrecoverable even in the future but when we perform a backup process, our data is more secure and gives the user confidence to do whatever he/she intends to do. It is advisable to backup your theme before we continue.
Step 13: Go To Restore
The restore command is as easy as changing your theme for good
Step 14: Upload Your Theme
Since we saved the theme on our liked folder, we have to revisit again and click on it and the upload process begins immediately.
Step 15: Click On Save Theme
When your theme has an error, it cannot be accepted. Making changes on the theme without any hint about it is not necessary instead you should consult an expert to help you out.


No comments:
Post a Comment